Management of Peripheral Devices
Management of IT Peripheral Devices
In addition to the automatic inventory of network devices, LOGINventory also offers the administration of the IT peripherals and accessories, such as monitors, docking stations, headsets, webcams, keyboards, mice, speakers, projectors, TVs, etc.. IT peripherals and accessories (except for monitors or USB sticks connected to the computer) cannot be registered automatically by LOGINventory’s scanning methods and must be manually created as a separate IT peripheral in LOGINventory. Only by creating a separate device as an IT peripheral, device related information can be stored and the authorized end user can be assigned to it. In addition, unique QR code labels can be printed for each device and the handover process is managed digital.
The hand out of the device is documented by signing for it on a mobile device which creates a new lifecycle entry in LOGINventory, our IT Asset Management Software. The recorded data is linked to both the end user and the device and can be accessed in LOGINventory and is available in the change history.
IT peripheral devices do not require a full asset license in LOGINventory, but can be administered as Add-on Assets at a much lower rate. With LOGINventory’s optional Add-on Asset management, you can maintain an overview of which devices are assigned to which end user and prevent asset loss.
Hint: Use Youtube’s subtitle option to translate subtitles into your desired language!
Test the IT management of peripheral devices and accessories with LOGINventory yourself!
Free download, ready to use in 5 minutes. Why not give it a try?
Hand Out and Return of IT Peripheral Devices
LOGINventory can generate an individual QR code label for all devices (no matter if scanned asset or IT peripheral device) automatically and can log the hand out of the device to the end user.
Step 1: Create Device Information
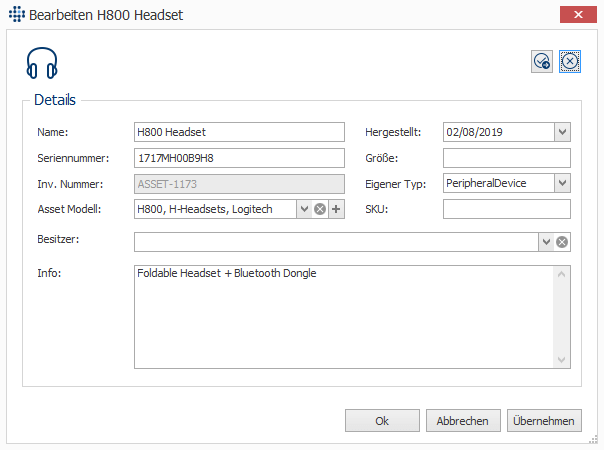
The creation in LOGINventory is the first step in the process of handing out IT peripherals and accessories. The IT peripherals are created via the Asset-Editor. Any relevant information can be stored here. If you have scanned PCs and retrieved information on connected peripherals, you can use this information and add further fields such as invoices, purchase price, location, etc..
Step 2: Assign an Individual Inventory Number
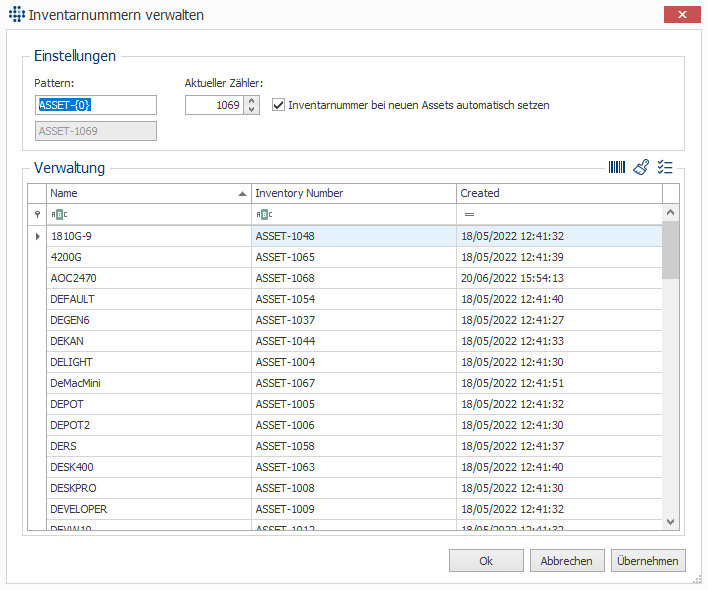
Ensure that an inventory number has been assigned to the device: This should be done automatically if the checkbox has been ticked in the inventory number management dialog window. If the device has not yet been assigned an inventory number, an inventory number can easily be generated in this dialog window. This inventory number is the basis for generating a unique web address for each device using a QR code.
Step 3: Print QR Code Labels
LOGINventory automatically generates ready-to-print labels in common formats. Only a label printer is required. The layout and content of the labels can be modified and personalized with the company’s own text or logo.
Step 4: Digital Documentation of Hand Out and Return via Mobile Devices
The QR code labels can easily be scanned with a smartphone or tablet. On the opening page, all recorded details of the device can be viewed. Further functions are available via “Handout” & “Return”.
To hand out a device to a user, select his name from the dropdown menu. Additionally, you can add notes, and a signature field allows the end user to sign directly on the phone. By completing the handout process, a lifecycle entry is created in LOGINventory containing the entered data and the signature, thereby confirming the end user of the device.
If the return of the device has to be logged, the procedure is similar, the field “Owner” will be set to empty.
Since version 9.6, even more functions are available here: Photos can be stored, properties can be edited, or several devices can be simultaneously assigned or returned.
Step 5: Tracking Devices
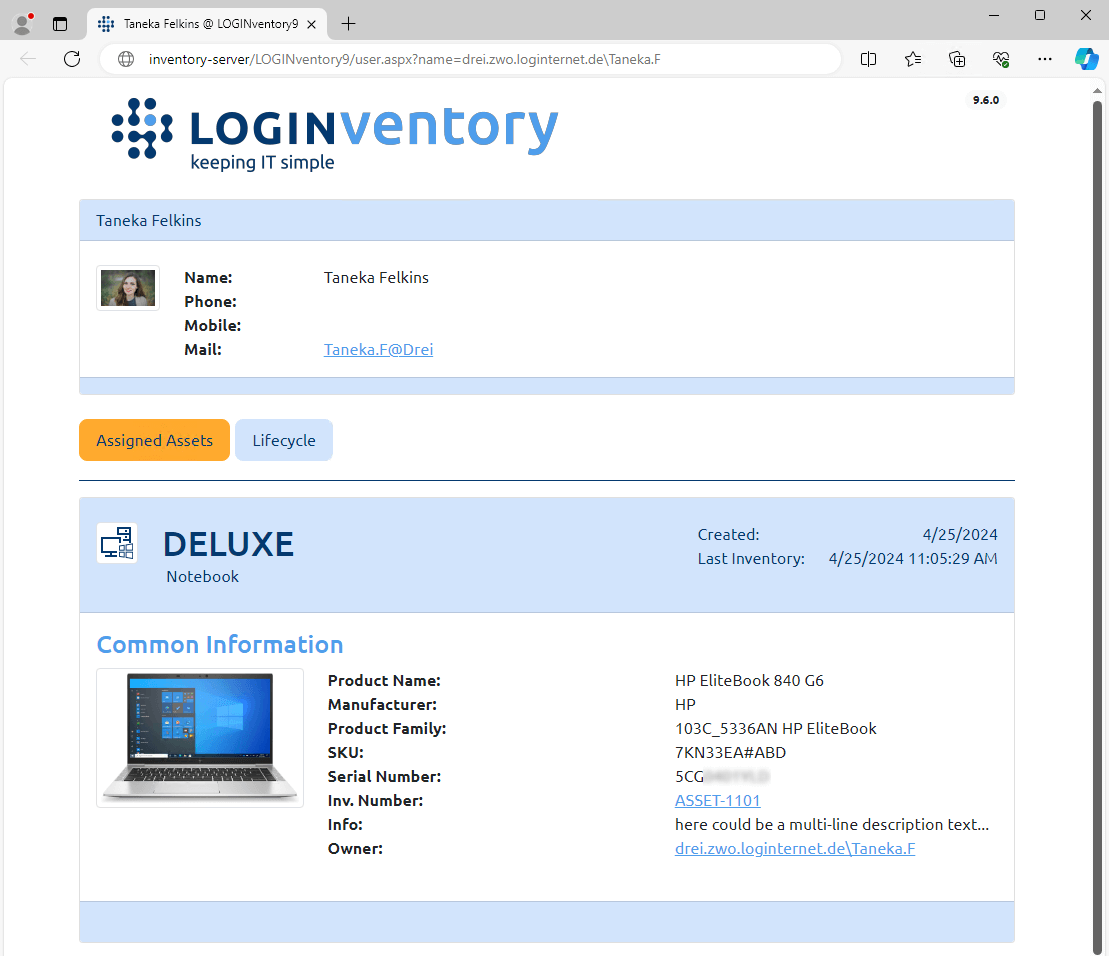
The web interface allows authorized users to view all details of assigned assets and lifecycle entries for all users via the web.
Users outside the LOGINventory authorization concept can also see the details linked to them in LOGINventory on the web. This allows them to track which devices they have signed for and when, and easily see which assets are assigned to them.
Interested in finding out more about it? Check out the manual to find out more how the hand out and return of peripheral devices works!
Test the IT management of peripheral devices and accessories with LOGINventory yourself!
Free download, ready to use in 5 minutes. Why not give it a try?


